|
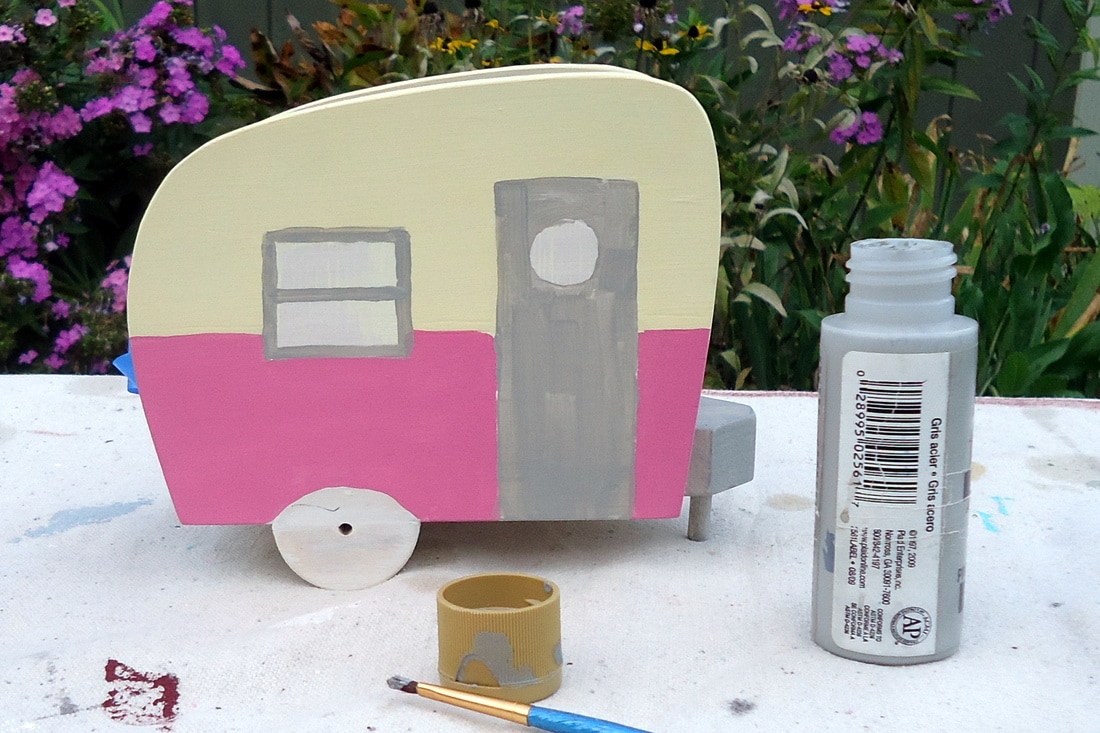
BY SCOTT @ SAWS ON SKATES - Do you love those adorable vintage camper trailers as much as I do? I hope so, because today we're turning a few pieces of scrap wood into a DIY painted wood vintage camper napkin holder! A while back I professed my love for flower power buses. Today I'm professing my love for vintage campers! I want a vintage camper soooo bad! The chrome, the fun 50's colors and the vintage kitchens... I WANT one! Until I get a vintage camper, I did the next best thing... I made my own vintage camper. I made a DIY painted wood vintage camper napkin holder! Fun "Do it yourself project" decoration for the next Vintage Camper Trailers rally that you attend. - PAUL I love that classic "canned ham" shape of those vintage camper trailers. It just puts a smile on my face :) I showed them to my buddy Rich and he said "They remind me of being a kid and camping with my grandparents... good memories!" Wouldn't a vintage camper napkin holder be fun on your next camping trip, 50's themed party or to add a pop of color to your table? Or what about as a gift for someone with a vintage camper or who enjoys camping? And just like I did for wooden tiki mask planter and flower power bus planter, I'll show you how to get freehand painted look. So don't worry if you can't paint. Neither can I! I'll show you my "paint by number system". You can do this!! This is another project that doesn't require much wood, so it's a perfect way to use your scrap wood. 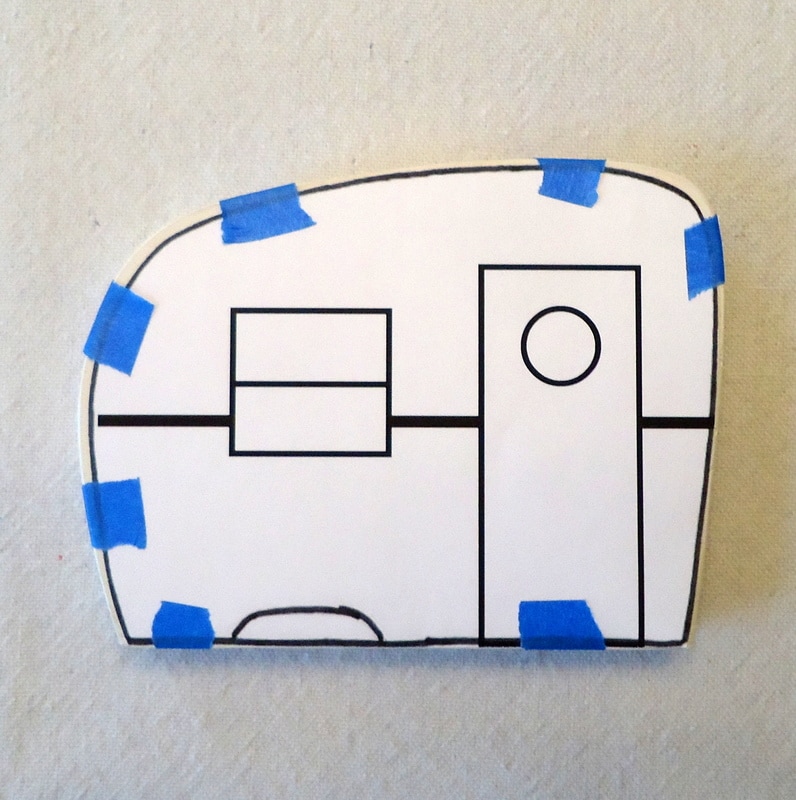 DIY Painted Wood Vintage Camper Napkin Holder Plan Supplies 1x5 - about 14" 1x2 - about 14" 1/4" dowel - about an 1" Wood glue 1-1/4" finish nails Roofing nails - for the hubcaps Primer Wood filler Craft paints Tools Tape Measure Miter Saw Jig Saw Kreg Multi-Mark Hole Saw Drill Hammer or nail gun 1/4" drill bit Step 1. Make the Campers. Cut out the camper template from the printed plan. Trace the template on 2 pieces of 1x5 and cut out using a jig saw. Sand the edges smooth. Temporarily reattach the template to one cutout with painter's tape. Trace the door, window, horizontal line and wheel arch with a ball point pen. The pen leaves a slight depression in the wood, so painting the campers will be as easy as painting in between the lines. On the second cutout, flip the template, temporarily attach to the cutout with painter's tape. Trace the window, horizontal line and wheel arch. Don't trace the door on this side. Step 2. Make the Bottom. Cut 1 piece of 1x2 to 6-1/4". On one end, measure in 9/16" on each side and cut a 45 degree angle at those marks to form the "tongue". On the tongue end, use the Kreg Multi-Mark to measure in 1/2". From the side measure in 3/4" Using a 1/4" drill bit, drill a hole 1/2" deep. I used painter's tape as a depth stop. This hole is for the "tongue jack". Step 3. Assemble the Camper. Apply glue to one edge of the bottom and place a camper side. Be sure the lines you traced in Step 1 face outward. Make sure the bottom of the camper bottom is flush with the bottom and attach using 1-1/4" finish nails. Repeat for the other side. Step 4. Make the Wheels. The wheels are made same way they were made for this project. Cut 2 pieces of 1x2 to 3". Clamp the pieces together and use an all to make mark in between the two pieces. Drill through the two pieces using a hole saw. These parts are small, so do not hold the wood while drilling, hold the clamp to keep your hand away from the hole saw. Step 5. Attach the Wheels. Apply glue to the edge of the wheels and center on the wheel arch (traced onto the camper in Step 1). Step 6. Attach the Tongue Jack. Cut the dowel to 1-1/4". Apply glue to the hole in the bottom and insert the dowel. Be sure the camper sits level and adjust if necessary. Step 7. Fill Holes, Prime and Paint. Fill the nail holes and any gaps between the body and wheels with Ready Patch. Prime the entire camper. Painting the campers is as easy painting in between the lines traced in Step 1. It's almost like "paint by number"! The tops of the campers were painted ivory and the bottoms were painted a vintage blue/green and pink.
The doors and window trim were painted a light gray then topped with a metallic silver paint. To help properly shape the tires, I installed the roofing nail and painted around it. First I painted the wheel rims the lower body color, but they blended in too much with the body. You'll notice in the final pics I repainted them ivory. Then paint the area between the wheel rim and wheel arch black. Finally I outlined the doors and windows with a dark grey to make them pop. All that's left to do is add some napkins, sit back and smile! www.sawsonskates.com
0 Comments
Leave a Reply. |
THE VINTAGE CAMPER TRAILERS MAGAZINE BLOG


Categories
All


This site contains affiliate links to products. We may receive a commission for purchases made through these links.
Archives
June 2024
This site contains affiliate links to products. We may receive a commission for purchases made through these links.
|


 RSS Feed